[Android] 탭(Tab)과 바텀 내비게이션(Bottom Navigation)
모든 내용은 Do it! 안드로이드 앱 프로그래밍을 바탕으로 정리한 것입니다.
일반적으로 모바일 단말은 화면 크기가 작기 때문에 하나의 화면에 너무 많은 구성 요소를 넣으면 성능이나 사용성 면에서 좋지 않음.
안드로이드의 경우에도 하나의 액티비티를 최대한 많이 분리시켜서 하나의 화면에 보이는 뷰의 개수를 줄이는 것이 좋음!
👆 BUT, 하나의 화면에 여러 가지 구성 요소를 넣어두고 필요할 때 전환하여 보여주는 것이 좋을 때도 있음
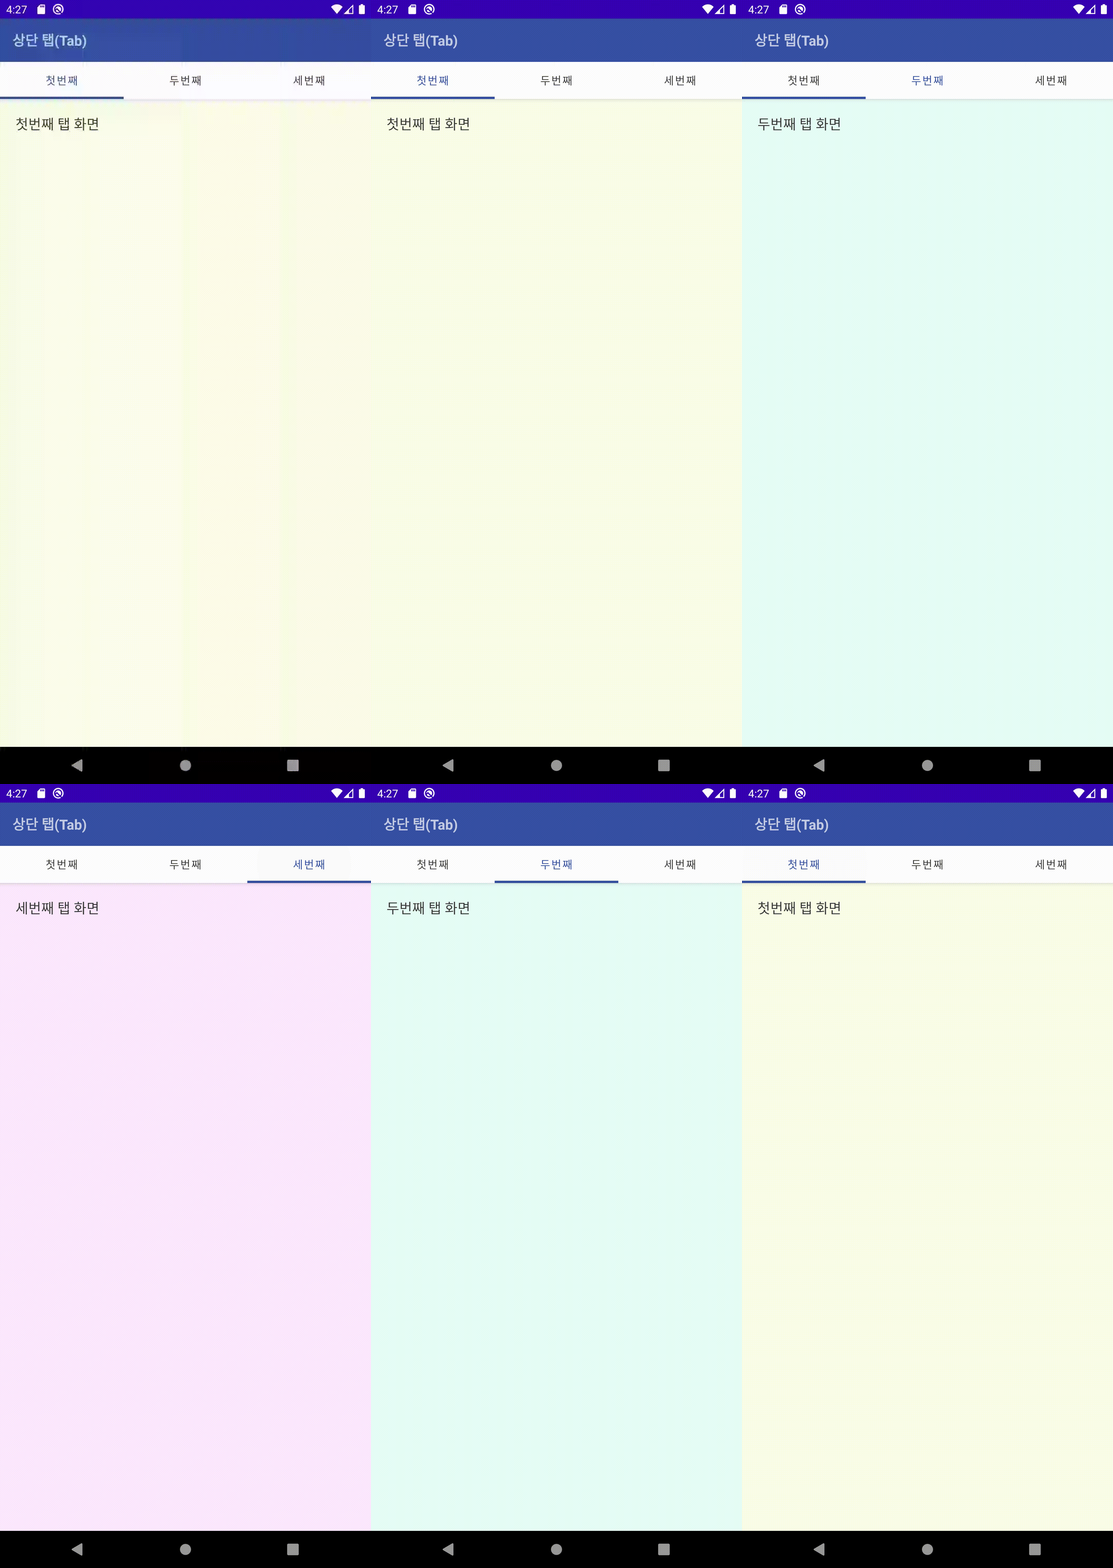
탭(Tab) : 몇 개의 버튼을 두고 그중 하나의 버튼을 눌러 서브 화면을 전환하는 방식
- 내비게이션(Navigation) 위젯
- 상단 탭과 하단 탭(Bottom Navigation)으로 구분할 수 있음
- 상단 탭은 액션바에 탭 기능을 넣어 보여주는 방법으로 제공됨
- 하단 탭은 별도의 위젯으로 제공됨
- 최근에는 하단 탭을 더 많이 사용하는 추세!
상단 탭(Tab)
activity_main.xml
<?xml version="1.0" encoding="utf-8"?>
<androidx.constraintlayout.widget.ConstraintLayout
    xmlns:android="http://schemas.android.com/apk/res/android"
    xmlns:app="http://schemas.android.com/apk/res-auto"
    xmlns:tools="http://schemas.android.com/tools"
    android:layout_width="match_parent"
    android:layout_height="match_parent"
    tools:context=".MainActivity">

    <androidx.coordinatorlayout.widget.CoordinatorLayout
        android:layout_width="match_parent"
        android:layout_height="match_parent">
        <com.google.android.material.appbar.AppBarLayout
            android:layout_width="match_parent"
            android:layout_height="wrap_content"
            android:theme="@style/Theme.AppCompat.Light.DarkActionBar">
            <androidx.appcompat.widget.Toolbar
                android:id="@+id/toolbar"
                android:layout_width="match_parent"
                android:layout_height="wrap_content"
                android:background="#364fa3"
                android:elevation="1dp"
                android:theme="@style/ThemeOverlay.AppCompat.Dark">
                <TextView
                    android:id="@+id/titleText"
                    android:layout_width="wrap_content"
                    android:layout_height="wrap_content"
                    android:text="상단 탭(Tab)"
                    android:textSize="18dp"
                    android:textStyle="bold"/>
            </androidx.appcompat.widget.Toolbar>
            <com.google.android.material.tabs.TabLayout
                android:id="@+id/tabs"
                android:layout_width="match_parent"
                android:layout_height="wrap_content"
                android:background="#fff"
                android:elevation="1dp"
                app:tabGravity="fill"
                app:tabMode="fixed"
                app:tabSelectedTextColor="#364fa3"
                app:tabTextColor="#3a3a3a"
                app:tabIndicatorColor="#364fa3"
                app:tabIndicatorHeight="3dp"/>
        </com.google.android.material.appbar.AppBarLayout>

        <FrameLayout
            android:id="@+id/container"
            android:layout_width="match_parent"
            android:layout_height="match_parent"
            app:layout_behavior="@string/appbar_scrolling_view_behavior">
        </FrameLayout>
    </androidx.coordinatorlayout.widget.CoordinatorLayout>
</androidx.constraintlayout.widget.ConstraintLayout>- CoordinatorLayout : 액션바 영역을 포함한 전체 화면의 위치를 잡아주는 역할
- AppBarLayout : 액션바
- 이 안에 Toolbar가 들어갈 수 있으며, 탭을 사용하는 경우 탭의 버튼들이 들어갈 TabLayout을 추가할 수 있음
- TabLayout : 탭
- tabMode = fixed, tabGravity = fill → 탭 버튼들이 동일한 크기를 갖도록 함
- tabIndicator : 탭을 선택하면 나오는 밑줄!
- tabIndicatorColor와 Height로 커스텀함
- FrameLayout을 넣어 화면의 내용을 구성
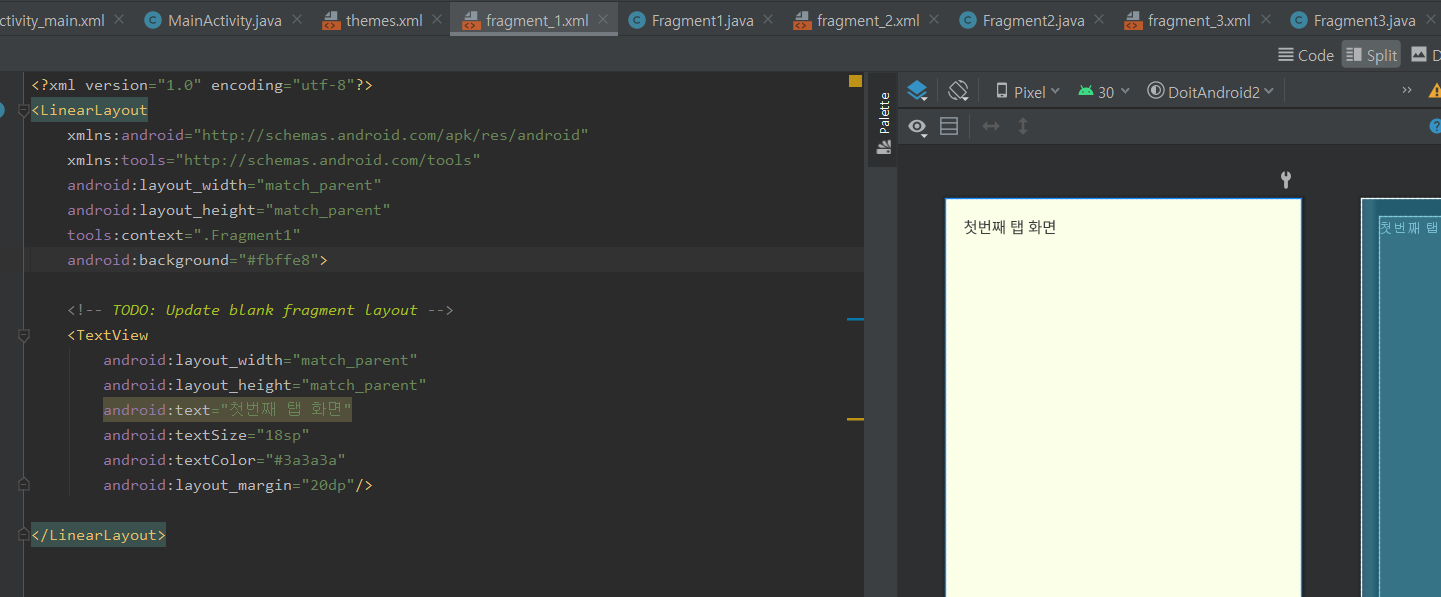
fragment_1, 2, 3.xml

탭 버튼을 3개로 만들 예정이기 때문에 띄워줄 화면도 3개 필요함!
프래그먼트(Fragment)를 3개 만들어 준다!
MainActivity.java
public class MainActivity extends AppCompatActivity {

    Toolbar toolbar;

    Fragment1 fragment1;
    Fragment2 fragment2;
    Fragment3 fragment3;

    @Override
    protected void onCreate(Bundle savedInstanceState) {
        super.onCreate(savedInstanceState);
        setContentView(R.layout.activity_main);

        toolbar = findViewById(R.id.toolbar);
        setSupportActionBar(toolbar);  // 액션바로 설정

        ActionBar actionBar = getSupportActionBar();
        actionBar.setDisplayShowTitleEnabled(false);

        fragment1 = new Fragment1();
        fragment2 = new Fragment2();
        fragment3 = new Fragment3();

        getSupportFragmentManager().beginTransaction().replace(R.id.container, fragment1).commit();

        // 탭 레이아웃에 탭 추가
        TabLayout tabs = findViewById(R.id.tabs);
        tabs.addTab(tabs.newTab().setText("첫번째"));
        tabs.addTab(tabs.newTab().setText("두번째"));
        tabs.addTab(tabs.newTab().setText("세번째"));

        tabs.addOnTabSelectedListener(new TabLayout.OnTabSelectedListener() {
            @Override
            public void onTabSelected(TabLayout.Tab tab) {
                int position = tab.getPosition();
                Log.d("MainActivity", "선택된 탭 : "+position);

                Fragment selected = null;
                if (position == 0) {
                    selected = fragment1;
                } else if (position == 1) {
                    selected = fragment2;
                } else if (position == 2) {
                    selected = fragment3;
                }

                getSupportFragmentManager().beginTransaction().replace(R.id.container, selected).commit();
            }

            @Override
            public void onTabUnselected(TabLayout.Tab tab) {

            }

            @Override
            public void onTabReselected(TabLayout.Tab tab) {

            }
        });
    }
}
👆 Toolbar나 ActionBar 등 import 할 때는 androidx.appcompat.widget 패키지 안에 들어있는 클래스를 import!
Toolbar 객체에 setSupportActionBar() 메서드를 사용해서 액션바로 설정해야 함!
👆 이때 setSupportActionBar() 메서드는 액티비티에 디폴트로 만들어진 액션바가 없을 경우에만 동작함!!
🤦♀️ 하지만 디폴트로 ActionBar가 설정되어 있기 때문에 해당 설정을 고쳐주지 않으면 이렇게 오류가 발생함
java.lang.IllegalStateException: This Activity already has an action bar supplied by the window decor. Do not request Window.FEAT...
res/values/themes/themes.xml에 들어가서
<style name="..." parent="Theme. ... .NoActionBar">로 변경하여 디폴트 액션바를 없애주자!!!

TabLayout
- TabLayout에 addTab() 메서드를 사용하여 탭 버튼을 추가함
- TabLayout에는 OnTabSelectedListener를 설정할 수 있음
- 이 리스너는 탭 버튼이 선택될 때마다 해당 리스너 안에 있는 onTabSelected() 메서드가 호출되도록 함
- 이 메서드는 현재 선택된 탭 객체가 전달되므로 탭의 position 정보를 확인하고 동작을 수행

바텀 내비게이션(Bottom Navigation)
res 폴더에 menu 디렉토리를 추가하고 Menu 리소스 파일을 만들어 줌

menu_bottom.xml
<?xml version="1.0" encoding="utf-8"?>
<menu xmlns:android="http://schemas.android.com/apk/res/android"
    xmlns:app="http://schemas.android.com/apk/res-auto">
    <item
        android:id="@+id/tab1"
        android:enabled="true"
        android:icon="@android:drawable/ic_dialog_email"
        android:title="이메일"
        app:showAsAction="ifRoom"/>
    <item
        android:id="@+id/tab2"
        android:icon="@android:drawable/ic_dialog_info"
        android:title="정보"
        app:showAsAction="ifRoom"/>
    <item
        android:id="@+id/tab3"
        android:icon="@android:drawable/ic_dialog_map"
        android:title="위치"
        app:showAsAction="ifRoom"/>
</menu>
item은 하단 탭에 들어갈 버튼 하나와 같음 → 이미지와 텍스트를 설정할 수 있음
botttom_activity.xml
<?xml version="1.0" encoding="utf-8"?>
<androidx.constraintlayout.widget.ConstraintLayout
    xmlns:android="http://schemas.android.com/apk/res/android"
    xmlns:app="http://schemas.android.com/apk/res-auto"
    xmlns:tools="http://schemas.android.com/tools"
    android:layout_width="match_parent"
    android:layout_height="match_parent"
    tools:context=".BottomActivity">

    <FrameLayout
        android:id="@+id/bottom_container"
        android:layout_width="match_parent"
        android:layout_height="match_parent"
        app:layout_behavior="@string/appbar_scrolling_view_behavior"/>

    <com.google.android.material.bottomnavigation.BottomNavigationView
        android:id="@+id/bottom_navigation"
        android:layout_width="match_parent"
        android:layout_height="wrap_content"
        android:background="@color/white"
        android:elevation="10dp"
        app:layout_constraintBottom_toBottomOf="parent"
        app:layout_constraintRight_toRightOf="parent"
        app:layout_constraintLeft_toLeftOf="parent"
        app:itemBackground="@color/white"
        app:itemIconTint="@drawable/bottom_navigation_color"
        app:itemTextColor="@drawable/bottom_navigation_color"
        app:menu="@menu/menu_bottom"/>

</androidx.constraintlayout.widget.ConstraintLayout>- BottomNavigationView : 하단 탭을 보여주는 위젯
- 하단에 표시될 수 있도록 layout_constraintBottom_toBottomOf를 설정해줌
- itemBackground : 각 탭의 배경색
- itemColorTint : 아이콘 색상
- itemTextColor : 텍스트 색상
- menu : menu 디렉토리에서 만들었던 xml 파일로 설정
💡 여기에서 itemColorTint와 itemTextColor로 설정된 파일은 @color가 아닌 @drawable인 이유?
→ 선택 여부(selected)에 따라 원하는 아이콘과 텍스트 색상으로 바꾸기 위해 커스텀한 파일!!
res/drawable 폴더에 <selector>로 시작하는 파일을 만들고, state_selected가 true/false인 item을 각각 만들어줌
state_selected = "true"면 선택되었을 경우, state_selected = "false"면 선택되지 않았을 경우
<?xml version="1.0" encoding="utf-8"?>
<selector xmlns:android="http://schemas.android.com/apk/res/android">
    <item
        android:state_selected="true"
        android:color="#364fa3"/>
    <item
        android:state_selected="false"
        android:color="#959595"/>
</selector>
BottomActivity.java
public class BottomActivity extends AppCompatActivity {

    Fragment1 fragment1;
    Fragment2 fragment2;
    Fragment3 fragment3;

    @Override
    protected void onCreate(Bundle savedInstanceState) {
        super.onCreate(savedInstanceState);
        setContentView(R.layout.activity_bottom);

        fragment1 = new Fragment1();
        fragment2 = new Fragment2();
        fragment3 = new Fragment3();

        getSupportFragmentManager().beginTransaction().replace(R.id.bottom_container, fragment1).commit();

        BottomNavigationView bottomNavigation = findViewById(R.id.bottom_navigation);
        bottomNavigation.setOnNavigationItemSelectedListener(new BottomNavigationView.OnNavigationItemSelectedListener() {
            @Override
            public boolean onNavigationItemSelected(@NonNull MenuItem item) {
                switch (item.getItemId()) {
                    case R.id.tab1:
                        Toast.makeText(getApplicationContext(), "첫번째 탭", Toast.LENGTH_SHORT).show();
                        getSupportFragmentManager().beginTransaction().replace(R.id.bottom_container, fragment1).commit();
                        return true;
                    case R.id.tab2:
                        Toast.makeText(getApplicationContext(), "두번째 탭", Toast.LENGTH_SHORT).show();
                        getSupportFragmentManager().beginTransaction().replace(R.id.bottom_container, fragment2).commit();
                        return true;
                    case R.id.tab3:
                        Toast.makeText(getApplicationContext(), "세번째 탭", Toast.LENGTH_SHORT).show();
                        getSupportFragmentManager().beginTransaction().replace(R.id.bottom_container, fragment3).commit();
                        return true;
                }
                return false;
            }
        });
    }
}
BottomNavigationView
- 탭이 선택되었을 때의 이벤트를 받아 처리하기 위한 클래스
- setOnNavigationItemSelectedListener() 메서드를 사용하여 리스너를 설정함
- 탭이 선택되었을 때 onNavigationItemSelected() 메서드를 호출
- 위의 예제에서는 토스트 메세지를 띄우고 프래그먼트(Fragment)를 바꿔줌

*프래그먼트(Fragment)에 관련된 내용은 아래 포스팅 참고!
[Android] 프래그먼트(Fragment)
모든 내용은 Do it! 안드로이드 앱 프로그래밍을 바탕으로 정리한 것입니다. 프래그먼트(Fragment) 🤷♀️ 리니어 레이아웃 안에 다른 레이아웃을 추가하거나 각각의 레이아웃 안에 필요한 뷰를
junyoung-developer.tistory.com