[Android] 위험 권한(Permission) 부여하기
모든 내용은 Do it! 안드로이드 앱 프로그래밍을 바탕으로 정리한 것입니다.
위험 권한
대부분 주요 권한들은 개인 정보가 담겨 있는 정보에 접근하거나 개인정보를 만들어 낼 수 있는 단말의 주요 장치에 접근할 때 부여됨
매니페스트에 넣어준 권한은 앱을 설치할 때 사용자가 허용하면 한꺼번에 권한이 부여되는데
마시멜로(API 23)부터는 중요한 권한들을 분류하여 설치 시점이 아니라 앱을 실행했을 때 사용자로부터 권한을 부여받도록 변경
일반 권한과 위험 권한
*일반 권한(Normal Permission) - 앱을 설치할 때 사용자에게 권한이 부여되어야 함을 알려주고 설치할 것인지 물어봄
→ 사용자가 부여할 권한들을 보고 수락하면 앱이 설치되고 앱에는 해당 권한들이 부여됨
*위험 권한(Dangerous Permission) - 앱 실행 시 사용자에게 권한을 부여할 것인지 물어봄
→ 사용자가 권한을 부여하지 않으면 해당 기능은 동작하지 않음
→ 앱을 설치했다고 하더라도 권한에 따라 실행할 수 있는 기능에 제약이 생기는 것
위험 권한의 세부 권한
| 위험 권한 그룹 | 세부 권한 |
| LOCATION |
|
| CAMERA |
|
| MICROPHONE |
|
| CONTACTS |
|
| PHONE |
|
| SMS |
|
| CALENDAR |
|
| SENSORS |
|
| STORAGE |
|
안드로이드 공식문서_Manifest.permission
* 과거에는 build.gradle(Module:app) 파일의 targetSdkVersion 값을 23 미만으로 설정하면 API 23 버전 이후의 플랫폼에서 검증된 앱이 아니라고 인식하여 위험 권한도 자동으로 부여되었음. 하지만 현재는 자동 부여하는 방식은 더 이상 사용할 수 없음
위험 권한 부여하기
AndroidManifest.xml
<?xml version="1.0" encoding="utf-8"?>
<manifest xmlns:android="http://schemas.android.com/apk/res/android"
    package="com.june.permissiontest">

    <uses-permission android:name="android.permission.READ_EXTERNAL_STORAGE"/>
    <uses-permission android:name="android.permission.WRITE_EXTERNAL_STORAGE"/>

    <application
        ...
    </application>

</manifest>- 기본 권한을 부여할 때는 <uses-permission> 태그를 사용함
- 기본 권한 중에서 SD 카드를 접근하는 권한은 위험 권한이므로 코드로 추가해야 함
MainActivity.java
public class MainActivity extends AppCompatActivity {

    @Override
    protected void onCreate(Bundle savedInstanceState) {
        super.onCreate(savedInstanceState);
        setContentView(R.layout.activity_main);

        // 위험 권한을 부여할 권한 지정
        String[] permissions = {
                Manifest.permission.READ_EXTERNAL_STORAGE,
                Manifest.permission.WRITE_EXTERNAL_STORAGE
        };

        checkPermissions(permissions);
    }

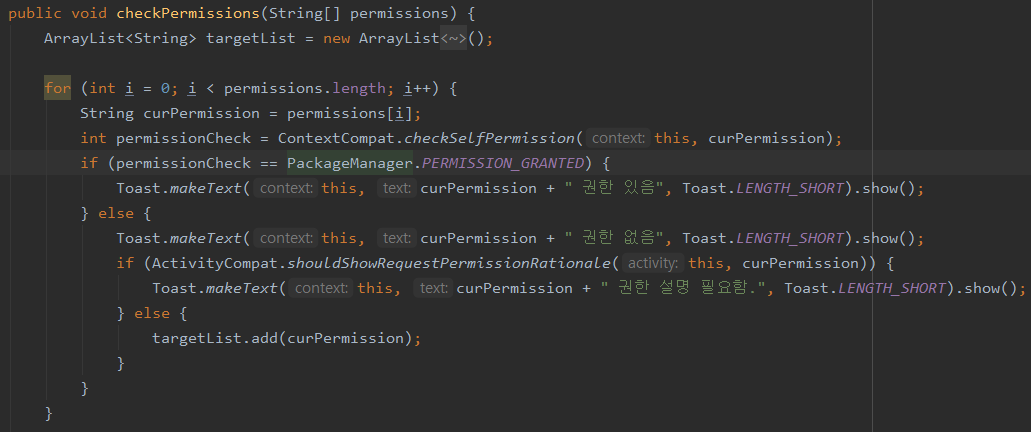
    public void checkPermissions(String[] permissions) {
        ArrayList<String> targetList = new ArrayList<String>();

        for (int i = 0; i < permissions.length; i++) {
            String curPermission = permissions[i];
            int permissionCheck = ContextCompat.checkSelfPermission(this, curPermission);
            if (permissionCheck == PackageManager.PERMISSION_GRANTED) {
                Toast.makeText(this, curPermission + " 권한 있음", Toast.LENGTH_SHORT).show();
            } else {
                Toast.makeText(this, curPermission + " 권한 없음", Toast.LENGTH_SHORT).show();
                if (ActivityCompat.shouldShowRequestPermissionRationale(this, curPermission)) {
                    Toast.makeText(this, curPermission + " 권한 설명 필요함.", Toast.LENGTH_SHORT).show();
                } else {
                    targetList.add(curPermission);
                }
            }
        }

        String[] targets = new String[targetList.size()];
        targetList.toArray(targets);

        // 위험 권한 부여 요청
        ActivityCompat.requestPermissions(this, targets, 101);
    }
}- SD 카드의 읽고 쓰는 권한은 위험 권한이므로 다이얼로그로 띄워야 함
- onCreate() 메서드에서 checkPermissions() 메서드를 호출하는 코드로 작성함
- checkPermissions() 에서 정해준 권한들에 대해 그 권한이 부여되어 있는지 먼저 확인함
- 권한이 부여되어 있지 않다면 ArrayList(targetList) 안에 넣었다가 부여되지 않은 권한들만 권한 요청을 함
- requestPermissions() 메서드를 호출하면 시스템에서 다이얼로그를 띄워주기 때문에 권한 수락/거절 여부를 콜백 메서드로 받아 확인하는 것이 필요함
    @Override
    public void onRequestPermissionsResult(int requestCode, @NonNull String[] permissions, @NonNull int[] grantResults) {
        super.onRequestPermissionsResult(requestCode, permissions, grantResults);

        switch (requestCode) {
            case 101:
                if (grantResults.length > 0 && grantResults[0] == PackageManager.PERMISSION_GRANTED) {
                    Toast.makeText(this, "첫 번째 권한을 사용자가 승인함", Toast.LENGTH_SHORT).show();
                } else {
                    Toast.makeText(this, "첫 번째 권한 거부됨", Toast.LENGTH_SHORT).show();
                }

                return;
        }
    }
}- onRequestPermissionsResult() 메서드에는 요청 코드와 함께 사용자가 권한을 수락했는지 여부가 파라미터로 전달됨
- 여러 권한을 한 번에 요청할 수 있기 때문에 grantResults 배열 변수 안에 수락 여부를 넣어 전달
- 앞에서 2개의 위험 권한을 요청했으므로 grantResults 배열의 길이는 2
- 사용자가 권한을 수락했다면 PackageManager.PERMISSION_GRANTED 상수가 결과 값으로 저장됨
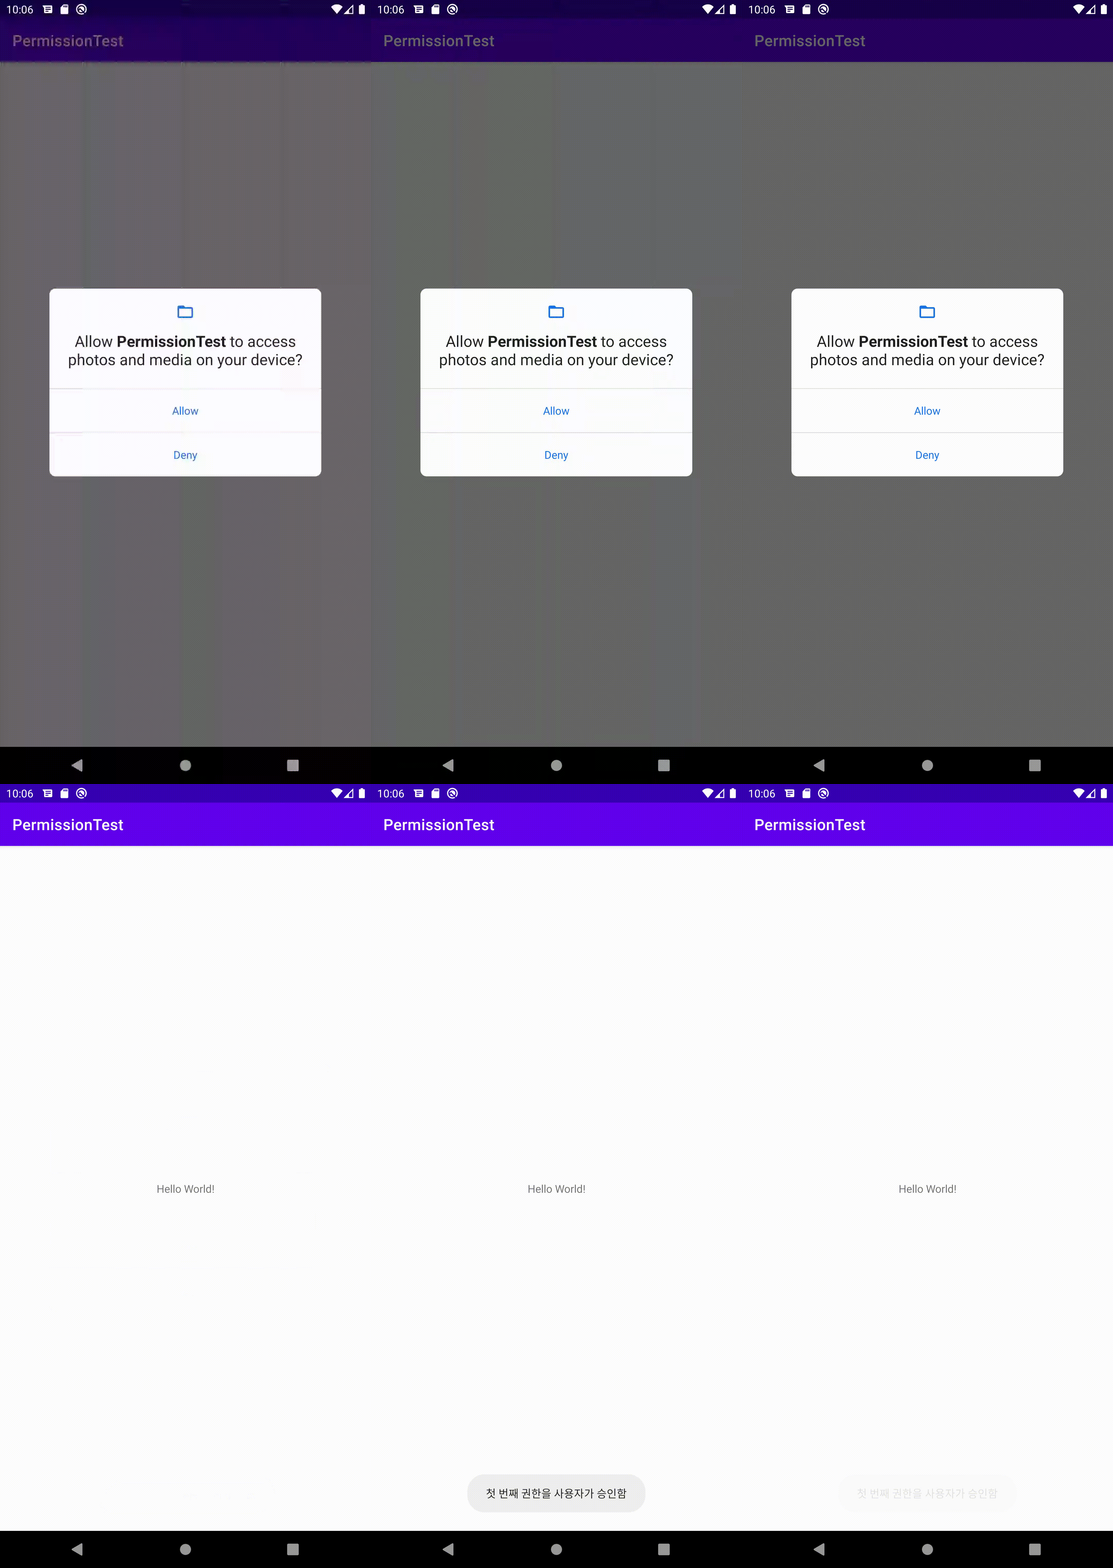

❗ [오류] Doit 안드로이드 프로그래밍 7판 380pg-383pg
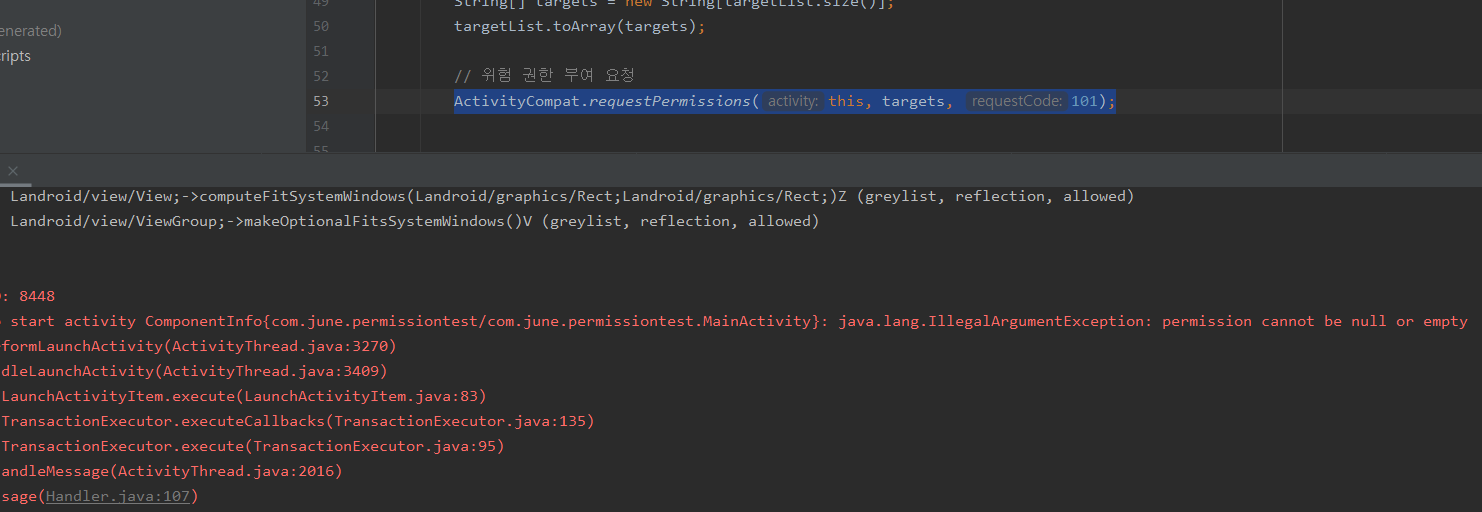
책에 있는 코드를 그대로 작성한 상태로 위험 권한을 Allow하고 다시 앱에 들어가 보니 이런 오류가 발생했다.
java.lang.IllegalArgumentException: permission cannot be null or empty
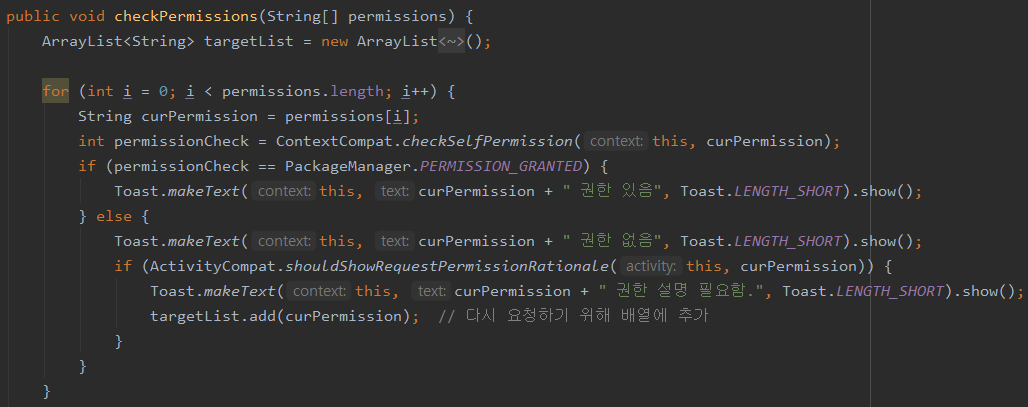
오류는 아래 드래그한 부분에서 난 것 같고, 현재 permission은 null이 될 수 없다고 하니, 아무래도 이전에 권한 수락을 해서 더 이상 권한이 없는데 다시 요청을 하라고 해서 발생한 오류인 것 같다. 그래서 코드는 현재 요청할 권한이 있는지 배열의 크기를 체크를 하는 코드로 변경하였다.

외부 라이브러리를 이용한 위험 권한 자동 부여하기
build.gradle(Module:app)
Sync Now를 눌러 외부 라이브러리를 다운받음
allprojects {
        repositories {
            maven { url 'https://jitpack.io' }
        }
    }
}

dependencies {
    ...
    implementation 'com.github.pedroSG94:AutoPermissions:1.0.3'
}
MainActivity.java
public class MainActivity extends AppCompatActivity implements AutoPermissionsListener {

    @Override
    protected void onCreate(Bundle savedInstanceState) {
        super.onCreate(savedInstanceState);
        setContentView(R.layout.activity_main);

        AutoPermissions.Companion.loadAllPermissions(this, 101);
    }

    @Override
    public void onRequestPermissionsResult(int requestCode, @NonNull String[] permissions, @NonNull int[] grantResults) {
        super.onRequestPermissionsResult(requestCode, permissions, grantResults);
        AutoPermissions.Companion.parsePermissions(this, requestCode, permissions, this);
    }

    @Override
    public void onDenied(int i, String[] permissions) {
        Toast.makeText(this, "permissions denied : " + permissions.length, Toast.LENGTH_SHORT).show();
    }

    @Override
    public void onGranted(int i, String[] permissions) {
        Toast.makeText(this, "permissions granted : " + permissions.length, Toast.LENGTH_SHORT).show();
    }
}- AndroidManifest.xml에 넣은 권한 중 위험 권한을 자동으로 체크한 후 권한 부여를 요청하는 방식
- onCreate() 메서드 안에서 loadAllPermissions() 메서드를 호출하면서 자동으로 권한을 부여하도록 요청함
- 권한 부여 요청 결과가 onRequestPermissionResult() 메서드로 전달됨
- 이 메서드 안에서 parsePermissions() 메서드를 호출하여 권한 부여 결과가 승인/거부로 나뉘면서 onGranted()와 onDenied() 메서드를 호출함
- 현재 코드에서는 승인된 권한의 개수와 거부된 권한의 개수를 각각 토스트 메세지로 띄워주고 있음
권한을 거절(Deny)한 경우, 오른쪽 사진과 같이 다시 한번 물어보는 다이얼로그가 생성된다.
이때 Deny&don't ask again 버튼이 생성되는 것을 확인할 수 있다.
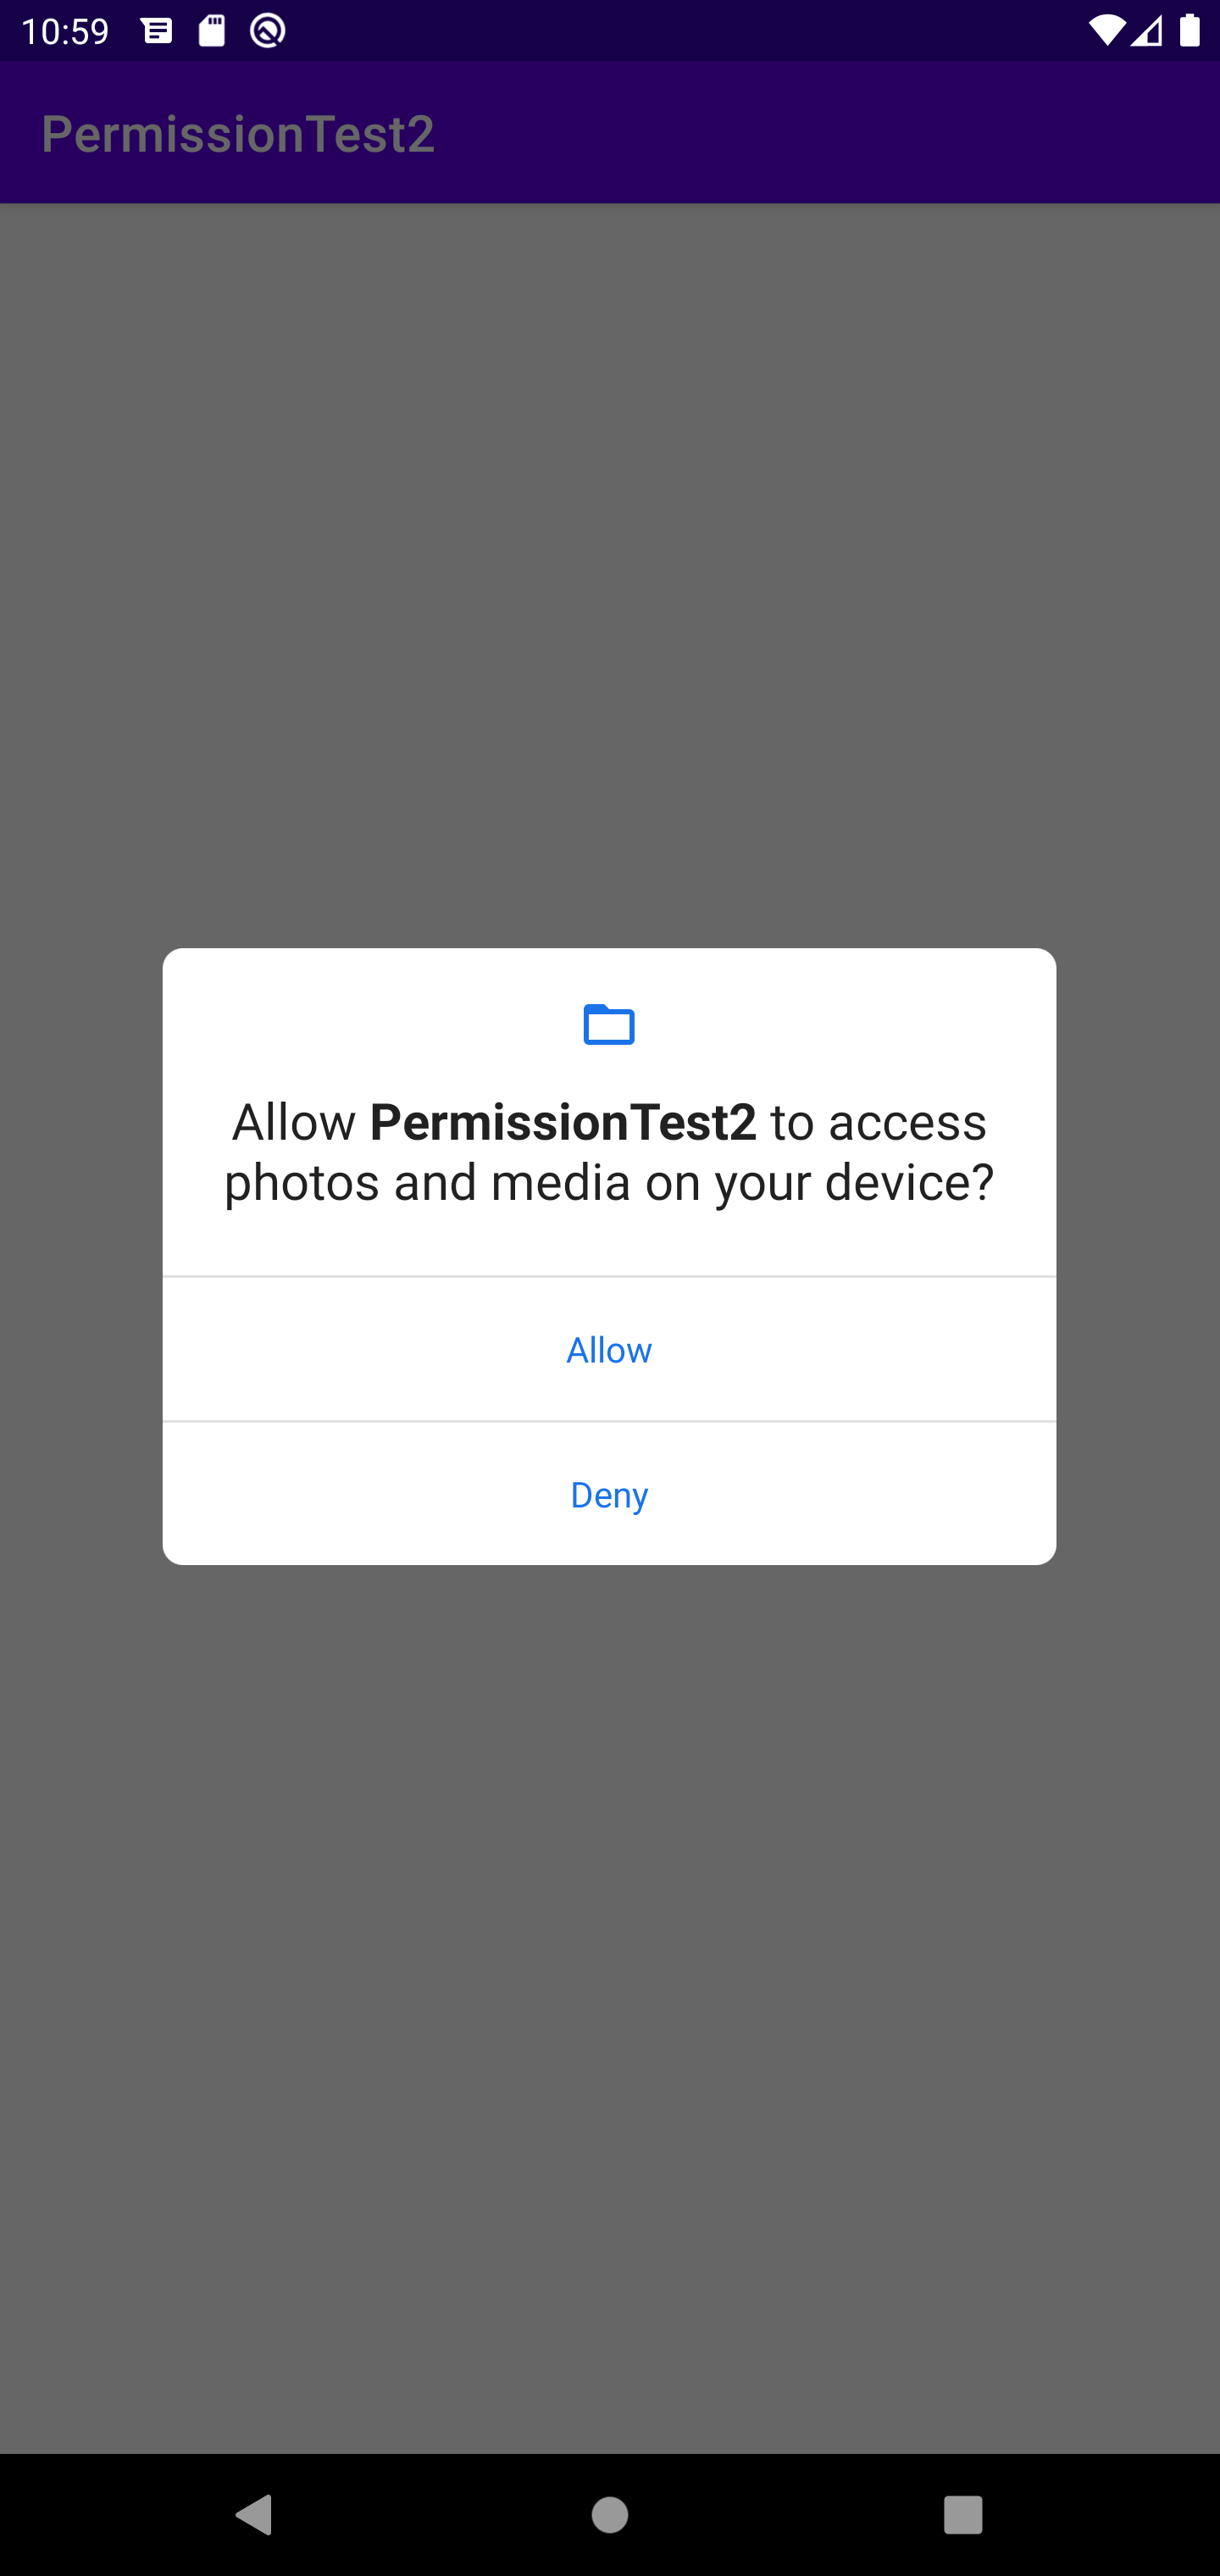
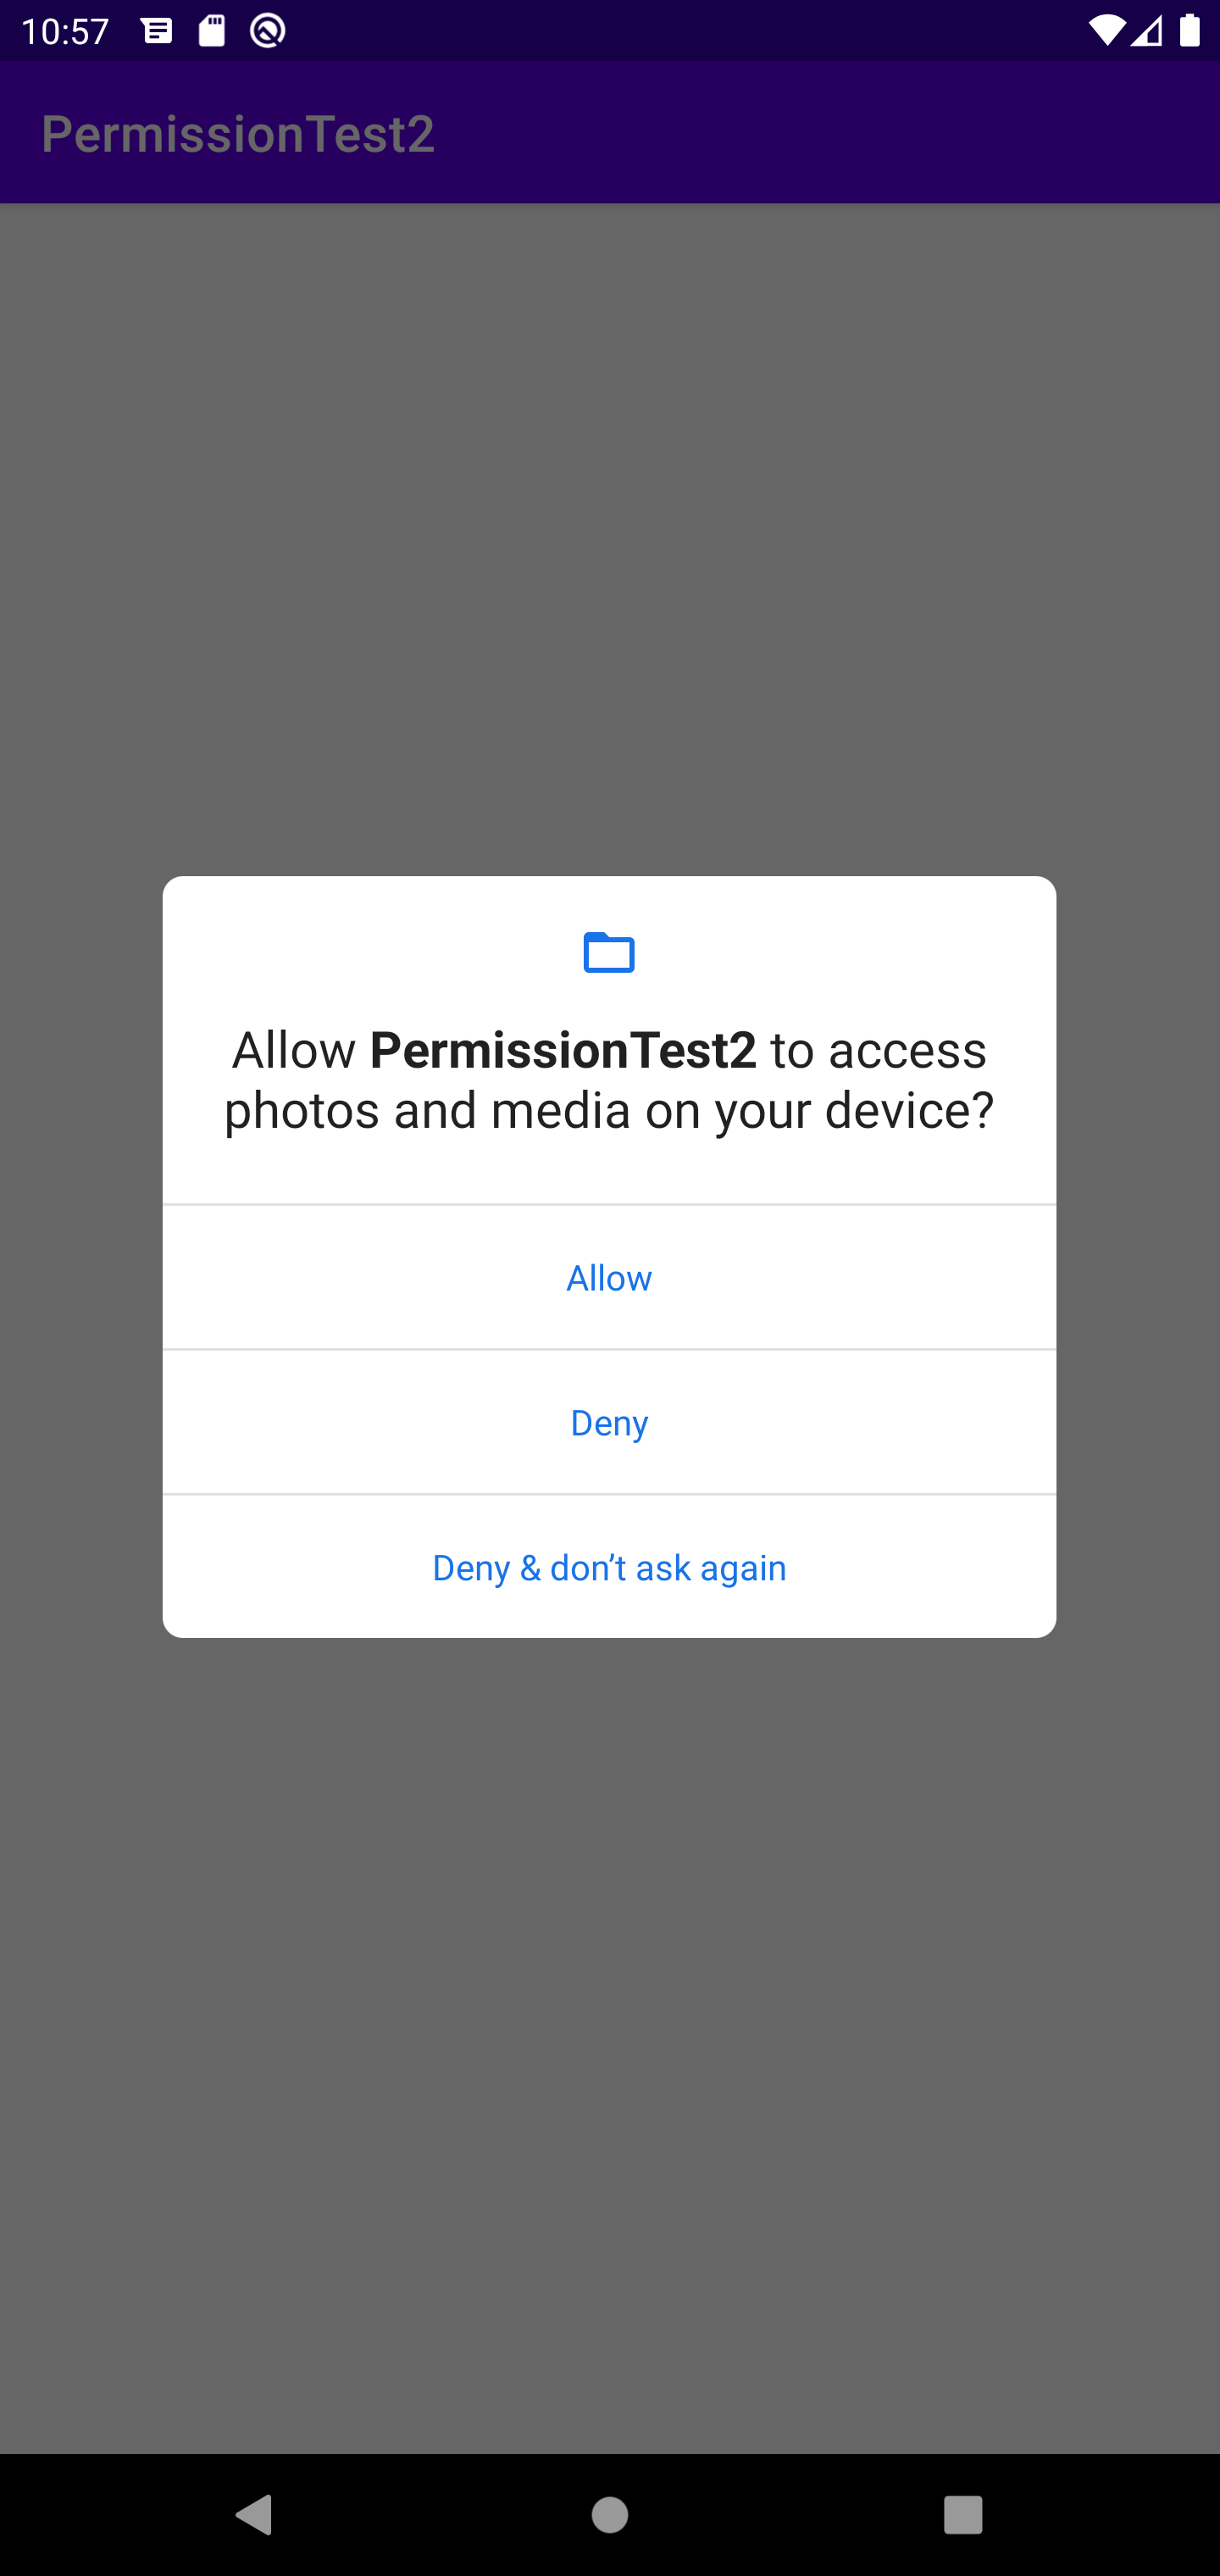
하지만 첫번째 예시에서는 거절하고 다시 앱을 실행했을 때, 다시 권한 요청을 하는 다이얼로그가 생성되지 않고 거절된 권한이라고 토스트 메세지가 뜬다. 해당 코드를 고치기 위해서 조건문을 수정했다.
